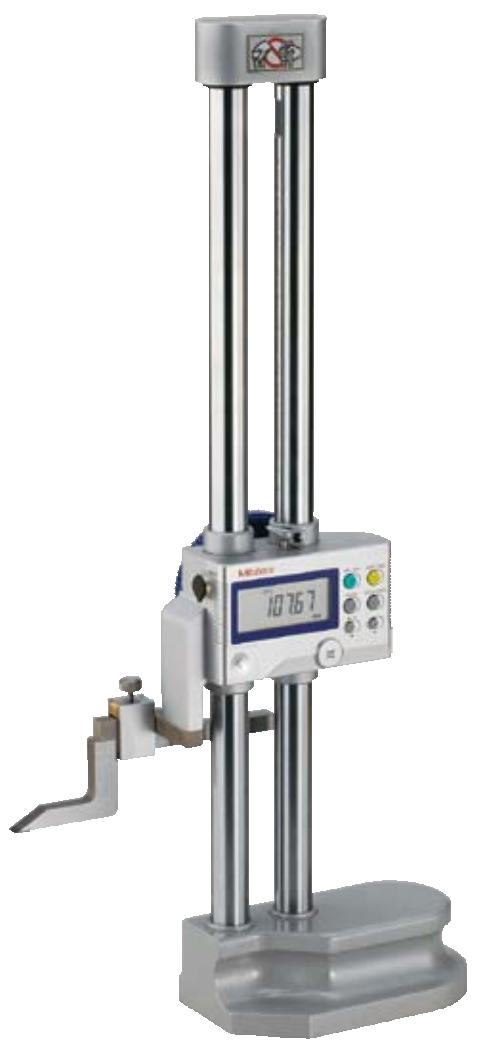
- Double-column structure ensures high measuring accuracy.

- Ergonomic base fits comfortably in the hand.
- Bidirectional touch-trigger probe is available as an optional accessory.
- Character height of the LCD display has been increased (10mm to 11mm) and a high- contrast LCD display unit adopted, so that the readability is improved.
- Inclined handle improves slider ergonomics.
- Allows integration into statistical process control and measurement systems. Refer to page A-3.
- Battery: SR44 (1 pc), 938882. For initial Battery: SR44 (1 pc), 938882. For initial operational checks (standard accessory)
- Battery life is 3,500 hours in continuous use.
- Carbide-tipped long scriber (No. 905200 with overall length of 150mm) is provided as a standard accessory. (Standard accessory: scriber cramp No. 05GZA033)
- For precision Black Granite Surface Plates, refer to page E-51.
SPECIFICATIONS
Metric
| Order No. | Range | Resolution | Accuracy* | Repeatability | Max. response speed | Height | Mass |
|---|---|---|---|---|---|---|---|
| 192-663-10 | 0 – 300mm |
0.01mm (0.005mm) |
±0.02mm |
0.01mm |
500mm/s | 510mm | 5.7kg |
| 192-664-10 | 0 – 600mm | ±0.04mm | 802mm | 8.3kg | |||
| 192-665-10 | 0 – 1000mm | ±0.06mm | 1228mm | 15.7kg |
* Excluding quantizing error
Inch/Metric
| Order No. | Range | Resolution | Accuracy* | Repeatability | Max. response speed | Height | Mass |
|---|---|---|---|---|---|---|---|
| 192-670-10 | 0 – 12″ |
.0005″/0.01mm (.0002″ /0.005mm) |
±.001″ |
0.01mm |
500mm/s |
510mm | 5.7kg |
| 192-671-10 | 0 – 18″ | ±.0015″ | 649mm | 7.5kg | |||
| 192-672-10 | 0 – 24″ | ±.0015″ | 802mm | 8.3kg | |||
| 192-673-10 | 0 – 40″ | ±.0025″ | 1228mm | 15.7kg |
* Excluding quantizing error
Functions
Origin-setting (ABS measurement mode): Any arbitrary value can be stored as the origin point.
Zero-setting (INC measurement mode): Displayed value can be set to zero at any arbitrary position of the slider.
Origin restoration: Previously set origin is restored when switching back to ABS mode.
Presetting (ABS INC measurement mode): Displayed value can be set to any arbitrary value, including negative values.
Measuring direction
Measuring direction can be switched at the press of a button.Data hold Display value can be held. Reverts to ABS or INC mode when cancelled.
Alarm: Error message is displayed when overflow or overspeed of displayed value arises and measurement is stopped.
Data output: Allows integration into statistical process control and measurement systems. (Refer to page A-3.)
Fine and coarse height adjustment through knob and wheel combination.
Slider height adjustment wheel allows fine and coarse height adjustment.
Coarse adjustment Fine adjustment
Push the small fine-adjustment knob in to disengage gearing and then turn the large wheel.
Pull the fine-adjustment knob out to engage gearing and then turn this knob, which then slowly turns the wheel.
Low-voltage alert: When battery voltage becomes low, a warning appears in the display.
* Probe-tip-diameter compensation mode is a function provided for Order No. 192-663-10/192-664-10/192-665-10/192-670-10/ 192-671-10/192-672-10/192-673-10.
Probe-tip diameter compensation: An adjustment is applied to the raw measurement data to compensate for the effect of the size of the spherical contact point used by the bidirectional touch-trigger probe.
Presetting (2 positions)
With two preset functions, two reference heights can be used relative to a surface plate.
- Example of preset 1
To measure a height of 70mm, with a reference plane height of 50mm - Example of preset 2
To measure a height of 130mm, with a reference plane height of 150mm
DIMENSIONS
Order No. 192-663-10, 192-664-10 ( ): No. 192-664-10
Order No. 192-665-20
Optional Accessory
Bidirectional touch-trigger probe
Improves accuracy in step, internal thickness, and outside width measurement by minimizing reproducibility error.
SPECIFICATIONS
Metric
| Order No. | Measuring direction | Relay contact type | Probe overtravel | Probe size | Repeatability | Measuring force | Standard accessories |
|---|---|---|---|---|---|---|---|
| 192-007 | Bidirectional | Normally Open | 1.5mm | ø3mm | : 2μm | 0.4N | Holder arm, Clamp |
Inch
| Order No. | Measuring direction | Relay contact type | Probe overtravel | Probe size | Repeatability | Measuring force | Standard accessories |
|---|---|---|---|---|---|---|---|
| 192-008 | Bidirectional | Normally Open | 1.5mm | ø3mm | : 2μm | 0.4N | Holder arm, Clamp |
For details of the connecting cable, refer to page D-39.
Connecting cables for IT/DP/MUX
905338: SPC cable (1m)
905409: SPC cable (2m)
USB Input Tool Direct
06ADV380F: SPC cable for USB-ITN-F (2m)
Connecting cables for U-WAVE-T
02AZD790F: SPC cable for U-WAVE (160mm)
02AZE140F: SPC cable for footswitch

