- ABSOLUTE electromagnetic induction linear encoder system is introduced (except for 0 – 300mm/0 – 12″ models).
- New ergonomic design with finger rest.
- The ZERO/ABS button allows the display to be Zero-Set at any slider position along the scale for comparison measurements. This button will also allow return to the absolute (ABS) mode and display of the true position from the origin (usually jaws closed point).
- Large and clear LCD readout.
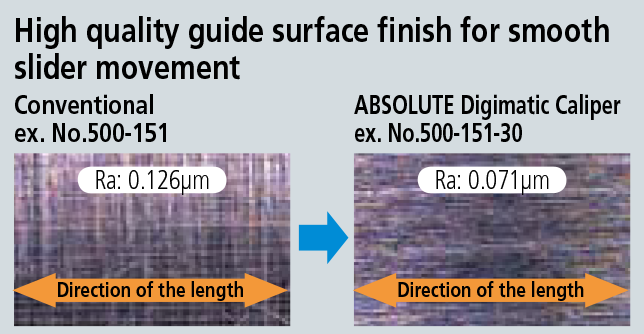
- Smooth slider movement makes for comfortable operation.
- 18,000 hours battery life.
- Allows step measurement.
- Carbide-tipped jaw calipers are optimal for rough finished parts, castings, grinding stones, etc.
- Allows integration into statistical process control and measurement systems for models with measurement data output connector. Refer to page A-3.
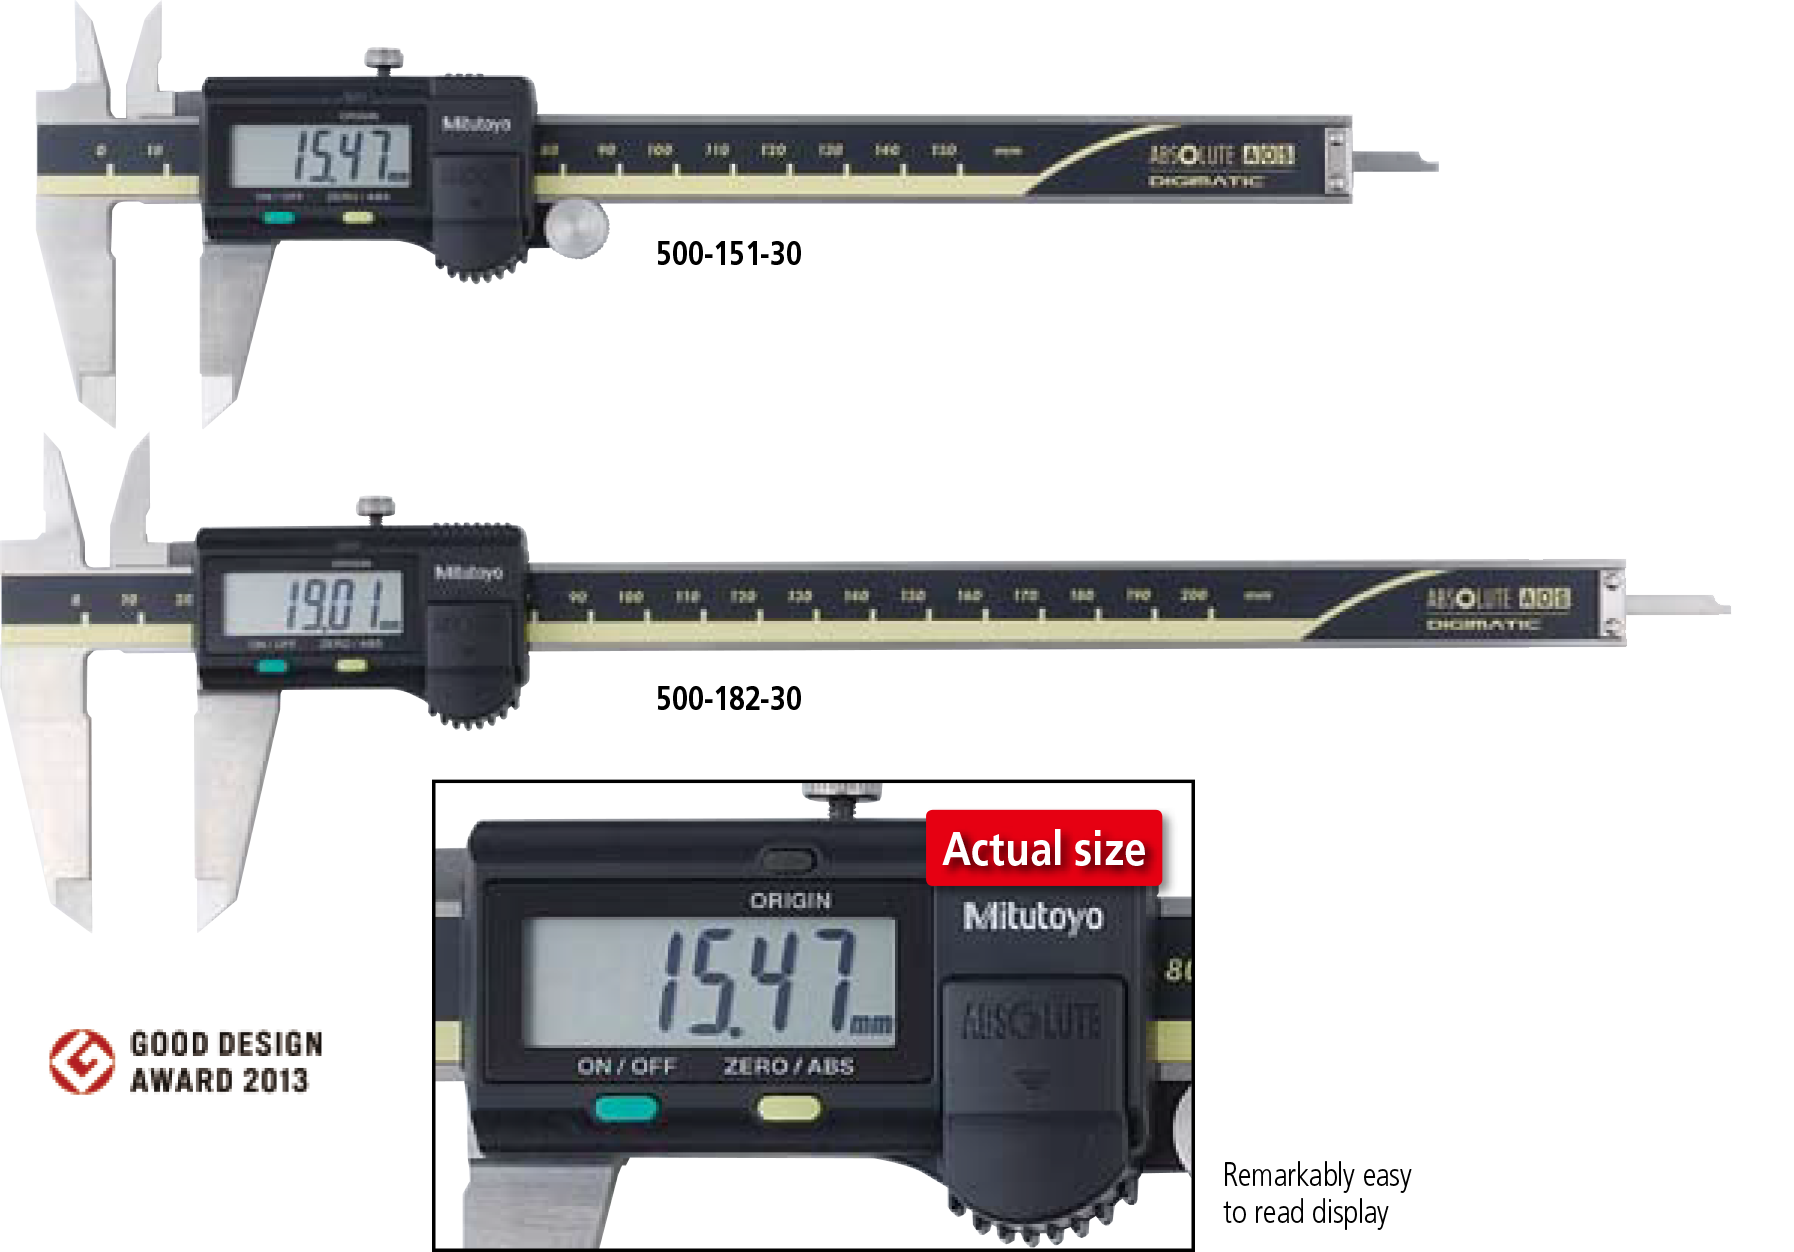
A built-in ABS (absolute) scale means that these calipers are ready to use immediately after power-on without origin resetting – just like using a vernier caliper.
Optional accessories
Dedicated for the models equipped with a digimatic output function. For details, refer to page D-39.
Connecting cables for IT/DP/MUX
959149: SPC cable with data button (1m)
959150: SPC cable with data button (2m)
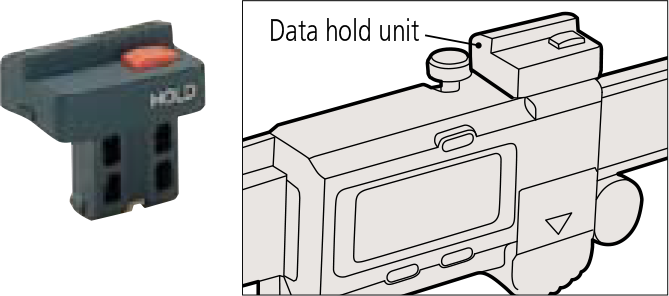
959143: Data hold unit
USB Input Tool Direct
06ADV380C: SPC cable for USB-ITN-C (2m)
Connecting cables for U-WAVE-T
02AZD790C: SPC cable for U-WAVE with data button (160mm)
02AZE140C: SPC cable for footswitch
SPECIFICATIONS
Metric
| Order No. | Range | Accuracy** | Mass | Depth bar | Fine adjustment | Remarks |
|---|---|---|---|---|---|---|
| 500-150-30 | 0 – 100mm |
±0.02mm |
137 | ø1.9mm rod | with thumb roller |
— |
| 500-180-30* | — | |||||
| 500-151-30 |
0 – 150mm |
162 |
Blade |
with thumb roller |
||
| 500-154-30 | Carbide-tipped jaws for outside measurement | |||||
| 500-155-30 | Carbide-tipped jaws for outside and inside measurement | |||||
| 500-158-30 | ø1.9mm rod |
— |
||||
| 500-181-30* |
Blade |
— | ||||
| 500-152-30 |
0 – 200mm |
192 |
with thumb roller |
|||
| 500-156-30 | Carbide-tipped jaws for outside measurement | |||||
| 500-157-30 | Carbide-tipped jaws for outside and inside measurement | |||||
| 500-182-30* | — | — | ||||
| 500-153 | 0 – 300mm | ±0.03mm | 350 | with thumb roller |
* Without SPC data output
* Not including quantizing error of ±1 count in LSD
Inch/Metric
| Order No. | Range | Accuracy** | Mass | Depth bar | Fine adjustment | Remarks |
|---|---|---|---|---|---|---|
| 500-170-30 | 0 – 4″ |
±.001″/ ±0.02mm |
137 | .075″ rod |
with thumb roller |
— |
| 500-195-30* | ||||||
| 500-171-30 |
0 – 6″ |
162 |
Blade |
|||
| 500-174-30 | Carbide-tipped jaws for outside measurement | |||||
| 500-175-30 | Carbide-tipped jaws for outside and inside measurement | |||||
| 500-178-30 | .075″ rod | — | ||||
| 500-196-30* |
Blade |
|||||
| 500-159-30* | Carbide-tipped jaws for outside measurement | |||||
| 500-160-30* | Carbide-tipped jaws for outside and inside measurement | |||||
| 500-172-30 |
0 – 8″ |
192 |
— | |||
| 500-176-30 | Carbide-tipped jaws for outside measurement | |||||
| 500-177-30 | Carbide-tipped jaws for outside and inside measurement | |||||
| 500-197-30* | — | |||||
| 500-163-30* | Carbide-tipped jaws for outside measurement | |||||
| 500-164-30* | Carbide-tipped jaws for outside and inside measurement | |||||
| 500-173 |
0 – 12″ |
±.0015″/ ±0.03mm |
350 |
— | ||
| 500-167 | Carbide-tipped jaws for outside measurement | |||||
| 500-168 | Carbide-tipped jaws for outside and inside measurement | |||||
| 500-193* | — | |||||
| 500-165* | — | Carbide-tipped jaws for outside measurement | ||||
| 500-166* | Carbide-tipped jaws for outside and inside measurement |
* Without SPC data output
* Not including quantizing error of ±1 count in LSD
DIMENSIONS
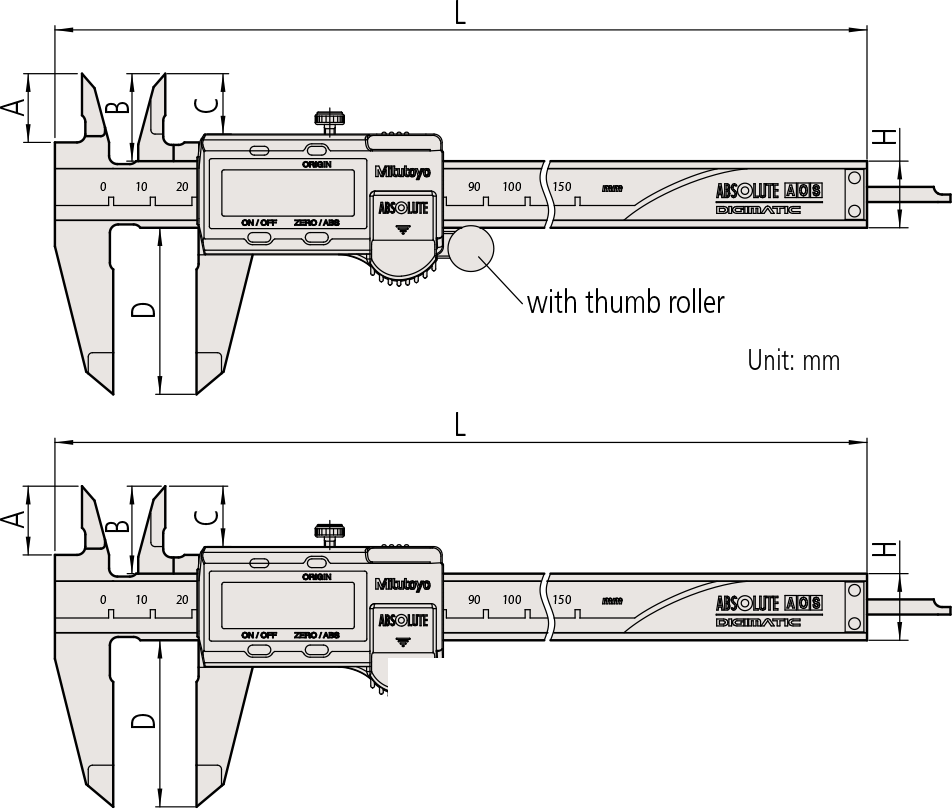
| Range | A | B | C | D | H | L |
|---|---|---|---|---|---|---|
| 0-100mm | 16.5 | 21 | 14.5 | 40 | 16 | 182 |
| 0-150mm | 16.5 | 21 | 14.5 | 40 | 16 | 233 |
| 0-200mm | 20 | 24.5 | 18 | 50 | 16 | 290 |
| 0-300mm | 22 | 27.5 | 19.8 | 64 | 20 | 404 |
Jaw thickness: 3.5mm for 0-100mm/0-150mm/0-200mm models and 3.8mm for 0-300mm model
Technical Data
Accuracy: ±0.02mm (≤200mm), ±0.03mm (≤300mm)
(excluding quantizing error)
Resolution: 0.01mm or .0005″/0.01mm
Repeatability: 0.01mm
Display: LCD
Scale type*: ABSOLUTE electromagnetic induction linear encoder
*ABSOLUTE electrostatic capacity static linear encoder for 0 – 300mm/0 – 12″ models.
Max. response speed: Unlimited
Battery: SR44 (1 pc), 938882,
for initial operational checks (standard accessory)
Battery life: Approx. 5 years under normal use (18,000 hours for continuous use)
Smooth slider movement makes for comfortable operation.
Functions
Absolute measurement: After power is turned ON, measurement can be started without zero-setting if origin-setting was previously performed. The Absolute origin position can be changed by the ORIGIN button.
Incremental measurement: Display can be set to zero at any arbitrary position for comparative measurements
Low-voltage alert: If the battery voltage becomes low, a “B” appears in the display to alert the user before
measurement is no longer possible. A battery change advisory alert precedes this alert.
Data output: By using the connecting cable (option), measurement data can be output.
Data hold: By using the data hold unit (option), the displayed value can be held. This cannot be used
with the data output function.


