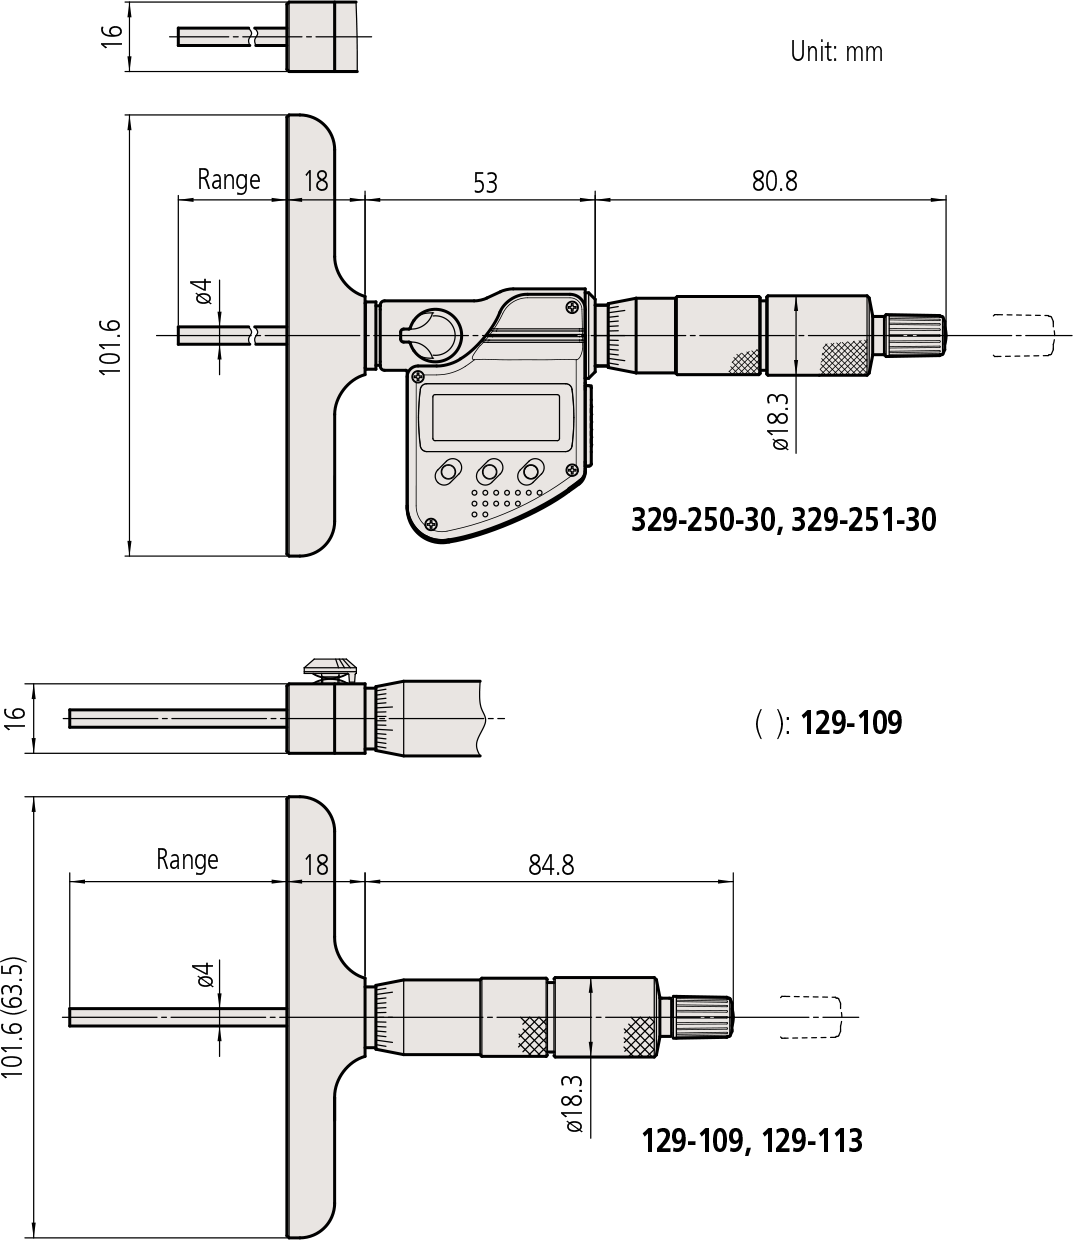
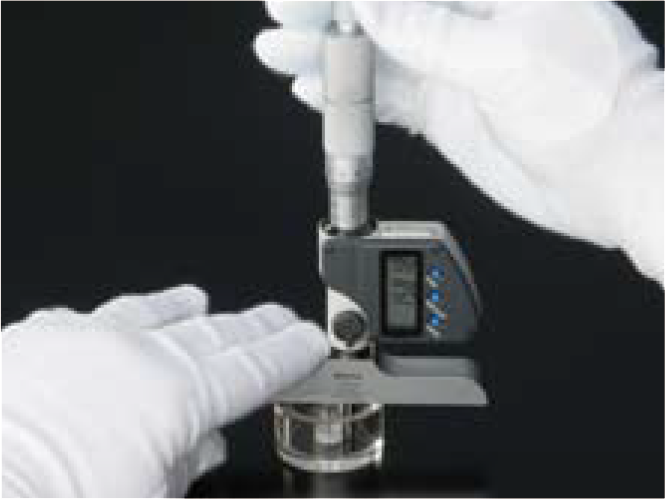
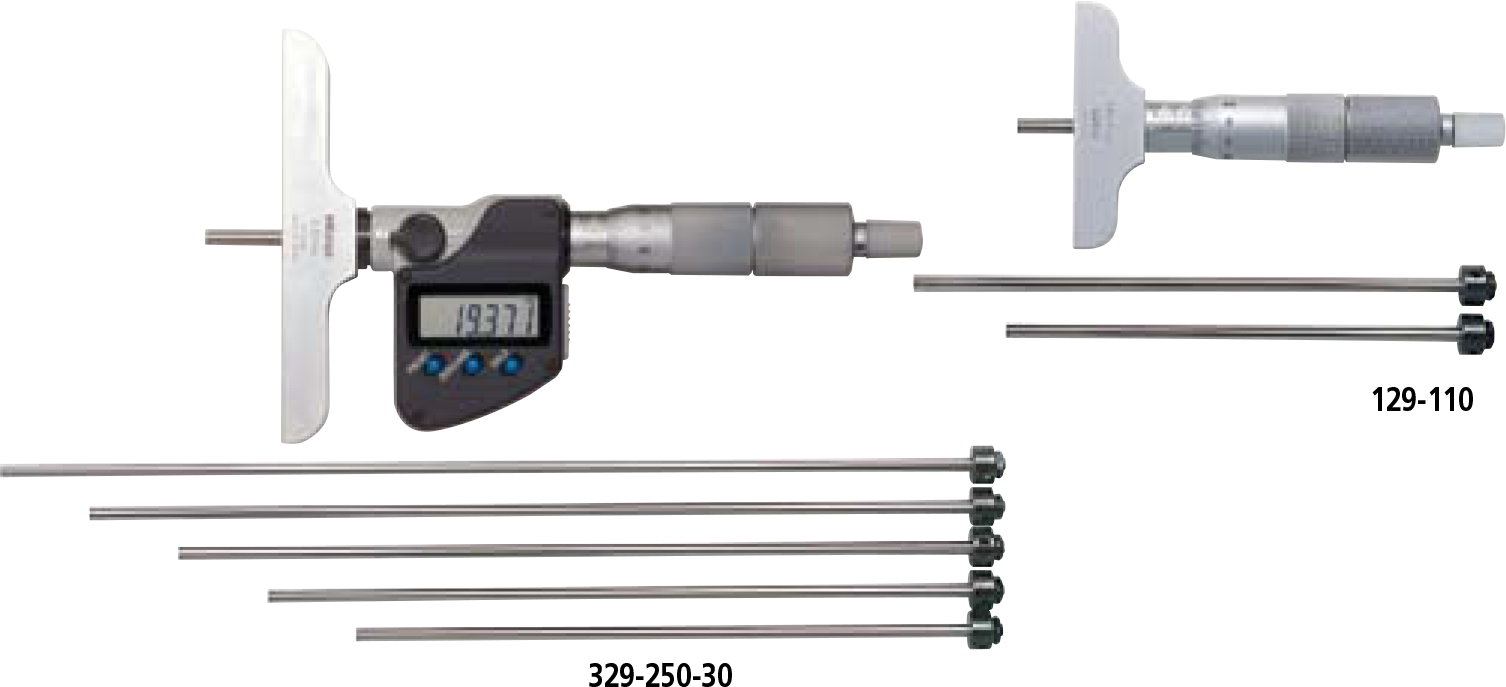
- This type uses interchangeable rods to enable wide-range measurement.
- Order Nos. 329-250-30, 329-251-30, 329-350-30, and 329-351-30 allow integration into statistical process control and measurement systems.
- Measuring rod diameter: ø4mm
- Measuring rod lock.
- Ratchet stop provides constant measuring force.
SPECIFICATIONS
Metric
| Order No. | Range | Resolution | Base | No. of rods |
|---|---|---|---|---|
| Digimatic (LCD) | ||||
| 329-250-30 | 0 – 150mm | 0.001mm | 101.6 x 16mm | 6 |
| 329-251-30 | 0 – 300mm | 12 | ||
Inch/Metric
| Order No. | Range | Resolution | Base | No. of rods |
|---|---|---|---|---|
| Digimatic (LCD) | ||||
| 329-350-30 | 0 – 6” | .00005″/0.001mm | 4” x .63” | 6 |
| 329-351-30 | 0 – 12” | .0001″/0.001mm | 12 | |
Metric
| Order No. | Range | Graduation | Base | No. of rods |
|---|---|---|---|---|
| Analog | ||||
| 129-154 | 0 – 25mm |
0.01mm |
63.5 x 16mm | 1 |
| 129-155 | 101.6 x 16mm | |||
| 129-109 | 0 – 50mm | 63.5 x 16mm | 2 | |
| 129-113 | 101.6 x 16mm | |||
| 129-110 | 0 – 75mm | 63.5 x 16mm | 3 | |
| 129-114 | 101.6 x 16mm | |||
| 129-111 | 0 – 100mm | 63.5 x 16mm | 4 | |
| 129-115 | 101.6 x 16mm | |||
| 129-112 | 0 – 150mm | 63.5 x 16mm | 6 | |
| 129-116 | 101.6 x 16mm | |||
| 129-152 | 0 – 300mm | 63.5 x 16mm | 12 | |
| 129-153 | 101.6 x 16mm | |||
Inch
| Order No. | Range | Graduation | Base | No. of rods |
|---|---|---|---|---|
| Analog | ||||
| 129-129 | 0 – 2” |
.001″ |
4” x .63” | 2 |
| 129-126 | 0 – 3” | 2.5” x .63” | 3 | |
| 129-130 | 4” x .63” | |||
| 129-127 | 0 – 4” | 2.5” x .63” | 4 | |
| 129-131 | 4” x .63” | |||
| 129-128 | 0 – 6” | 2.5” x .63” | 6 | |
| 129-132 | 4” x .63” | |||
| 129-149 | 0 – 12” | 2.5” x .63” | 12 | |
| 129-150 | 4” x .63” | |||
* For the function of Digimatic models 329-250-30, 329-251-30, 329-350-30, and 329-351-30, refer to page D-62. These models are not waterproof.
Interchangeable rod (Optional Accessories)
(Check and adjust the origin point before measurement)
| Range | 0 – 25mm | 25 – 50mm | 50 – 75mm | 75 – 100mm | 100 – 125mm | 125 – 150mm | 150 – 175mm | 175 – 200mm | 200 – 225mm | 225 – 250mm | 250 – 275mm | 275 – 300mm | |
|---|---|---|---|---|---|---|---|---|---|---|---|---|---|
| Analog models | Order No. | 983501 | 983503 | 983505 | 983507 | 983509 | 983511 | 983525 | 983527 | 983529 | 983531 | 983533 | 983535 |
| L | 104mm | 129mm | 154mm | 179mm | 204mm | 229mm | 254mm | 279mm | 304mm | 329mm | 354mm | 379mm | |
| Digimatic models | Order No. | 983505 | 983507 | 983509 | 983511 | 983525 | 983527 | 983529 | 983531 | 983533 | 983535 | 981781 | 981782 |
| L | 154mm | 179mm | 204mm | 229mm | 254mm | 279mm | 304mm | 329mm | 354mm | 379mm | 404mm | 429mm | |
| Range | 0 – 1” | 1 – 2” | 2 – 3” | 3 – 4” | 4 – 5” | 5 – 6” | 6 – 7” | 7 – 8” | 8 – 9” | 9 – 10” | 10 – 11” | 11 – 12” | |
|---|---|---|---|---|---|---|---|---|---|---|---|---|---|
| Analog models | Order No. | 983502 | 983504 | 983506 | 983508 | 983510 | 983512 | 983526 | 983528 | 983530 | 983532 | 983534 | 983536 |
| L | 104.3mm | 129.7mm | 155.1mm | 180.5mm | 205.9mm | 231.3mm | 256.7mm | 282.1mm | 307.5mm | 332.9mm | 358.3mm | 383.7mm | |
| Digimatic models | Order No. | 983506 | 983508 | 983510 | 983512 | 983526 | 983528 | 983530 | 983532 | 983534 | 983536 | 981783 | 981784 |
| L | 155.1mm | 180.5mm | 205.9mm | 231.3mm | 256.7mm | 282.1mm | 307.5mm | 332.9mm | 358.3mm | 383.7mm | 409.1mm | 434.5mm | |
DIMENSIONS
Technical Data
Accuracy:
±3μm/±.00015” for micrometer head (Excluding quantizing error)
Flatness of reference face:
1.3μm (.00005”) for 63.5mm (2.5”) length base,
2μm (.00008”) for 101.6mm (4”) length base
Flatness of measuring rod face: 0.3μm
Parallelism between reference face and measuring rod face:
(4+R/50)μm, R = Max. measuring length (mm)
Fraction rounded up
±(2+R/75)μm for interchangeable rod,
R = Max. range (mm)
Fraction rounded up
Battery: SR44 (1 pc), 938882,
for initial operational checks (standard accessory)
Battery life*: Approx. 2.4 years under normal use
* Digital models
Scale type: Electromagnetic induction absolute encoder
Optional accessories for 329-250-30, 329-251-30, 329-350-30, and 329-351-30.
For details, refer to page A-21. Connection cable for 329-250-30, 329-251-30, 329-350-30, and 329-351-30
05CZA662: SPC cable with data button (1m)
05CZA663: SPC cable with data button (2m)
USB Input Tool Direct
06ADV380B: SPC cable for USB-ITN-B (2m)
Connection cables for U-WAVE-T
02AZD790B: SPC cable for U-WAVE with data button (160mm)
02AZE140B: SPC cable for footswitch
Functions of 329-250-30, 329-251-30, 329-350-30, and 329-351-30
ORIGIN set: Resets the ABS (absolute) origin at (ABS measurement system) the current position.
ZERO set (INC measurement ) : The display is set to zero at the current position for incremental (comparative) mode measurements. Absolute system measurement mode can easily be restored when required.
Preset: Enters a specified value into the display at the current position.
Hold: The displayed value is temporarily held at the current value so that the instrument can be moved before the display is read. Useful for making measurements in difficult-to-access.
Measurement data output: Equipped with a Digimatic data output port to incorporate instrument into an SPC or networked measurement system.
Auto-power ON/OFF: If the instrument is not used for approximately 20 minutes, the display turns off while keeping the current origin of the ABS measurement system. The display is restored when the spindle is rotated.
Error alarm: If overflow of the display or a calculation error occurs, the measurement function stops and a message is displayed.
Measurement will not be continued so as to avoid an erroneous display value. Warning light indicates low
battery.
Function lock: PRESET (origin set) and ZERO (zero set) buttons can be locked in order to prevent them being changed unintentionally.


