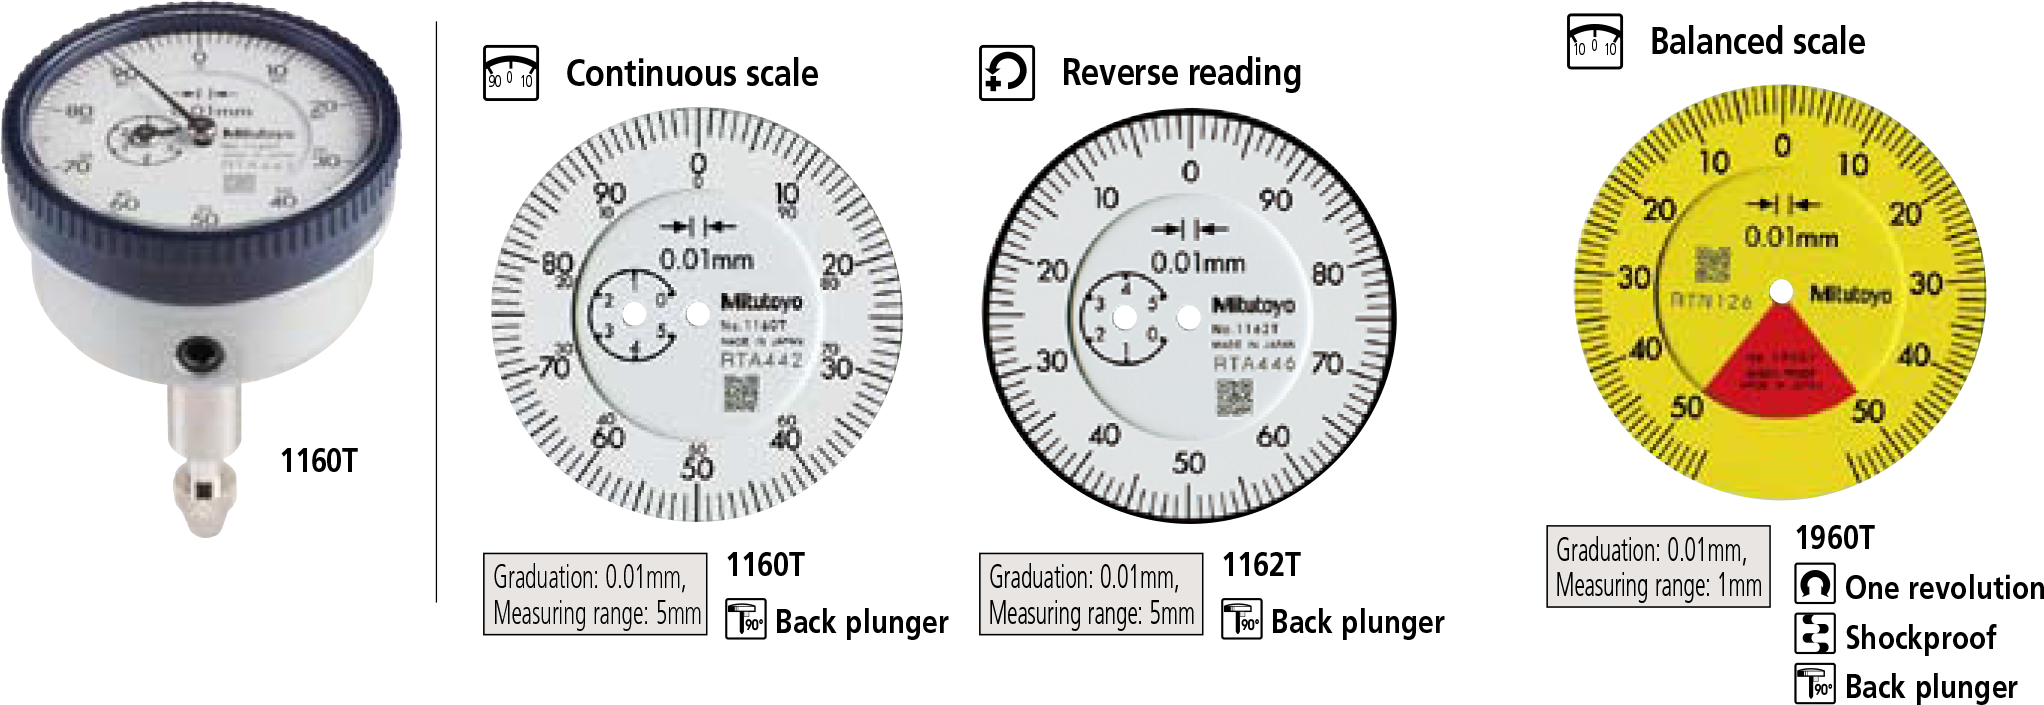
- Back plunger type dial gauges are suitable for mounting onto leveling machine tool tables or inspection jigs, and for use in situations where standard dial gauges are difficult to read.
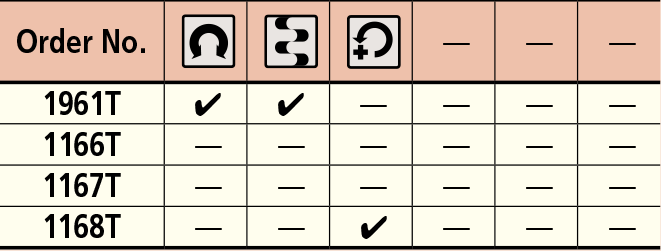
- Model 1960T and 1961T, which uses Mitutoyo’s proprietary shock-proofing mechanism, has excellent durability and shock resistance.
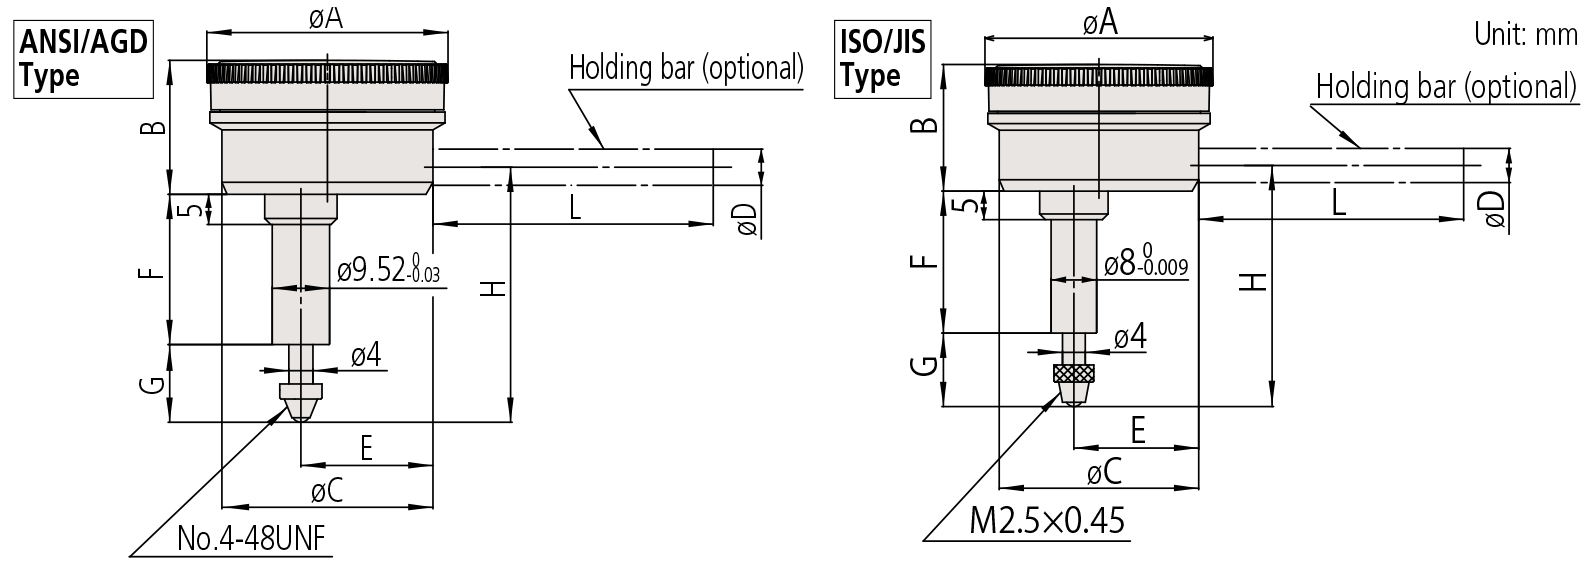
DIMENSIONS
| Order No. | A | B | C | E | F | G | H |
|---|---|---|---|---|---|---|---|
| 1166T | 40 | 22.1 | 35.6 | 22.2 | 25 | 10.9 | 42 |
| 1167T | 40 | 22.1 | 35.6 | 22.2 | 25 | 10.9 | 42 |
| 1168T | 40 | 22.1 | 35.6 | 22.2 | 25 | 10.9 | 42 |
| 1961T | 40 | 22.1 | 35.6 | 22.2 | 25 | 10.9 | 40 |
| Order No. | A | B | C | E | F | G | H |
|---|---|---|---|---|---|---|---|
| 1160T | 40 | 22.1 | 35.6 | 22.2 | 25 | 13.8 | 43.3 |
| 1162T | 40 | 22.1 | 35.6 | 22.2 | 25 | 13.8 | 43.3 |
| 1960T | 40 | 22.1 | 35.6 | 22.2 | 28.7 | 12.8 | 46 |
Note 1:
Contact point (standard accessory) for all products in this page has a role as a top dead point stopper. For this reason, if you need to install an optional contact point with an outside diameter smaller than 7mm, use a washer (with outside diameter of at least 7mm, inside diameter of 3mm, and thickness of approx. 0.5mm) placed between the contact point and the spindle.
Note 2:
Dimensions of the inch (ANSI/AGD Type) dial indicator partly differ from those of the metric (ISO/JIS Type) indicator.
Note 3:
Inch (ANSI/AGD Type) dial indicators are provided with a stem of 3/8″ dia. and #4-48UNF thread mount for the contact point.
SPECIFICATIONS
Metric
| Order No. | Graduation | Range (range/rev) | Accuracy | Repeatbility | Dial reading | Measuring force | |||
|---|---|---|---|---|---|---|---|---|---|
| Overall | Retrace | 1/10 Rev | 1 Rev | ||||||
| 1960T | 0.01mm | 1mm (1.27mm) | 14µm | 4µm | 8µm | — | 3µm | 50-0-50 | 1.4N or less |
| 1160T | 0.01mm | 5mm (1mm) | 16µm | 4µm | 8µm | 14µm | 3µm | ±0-100 | 1.4N or less |
| 1162T | 0.01mm | 5mm (1mm) | 16µm | 4µm | 8µm | 14µm | 3µm | 100-0 | 1.4N or less |
* Completed products inspection is performed in the vertical position (contact point downward) and the stated accuracy is guaranteed.
Inch
| Order No. | Graduation | Range (range/rev) | Accuracy | Repeatbility | Dial reading | Measuring force | |
|---|---|---|---|---|---|---|---|
| First 1 Rev / 2.5 Rev / 10 Rev | Retrace | ||||||
| 1961T | .001” | .04” (.05”) | ±.001” / — / — | .0002” | ±.0002” | 20-0-20 | 1.4N or less |
| 1166T | .001” | .2” (.05”) | ±.001” / ±.001” / ±.001” | .00033” | ±.0002” | ±0-50 | 1.4N or less |
| 1167T | .001” | .2” (.05”) | ±.001” / ±.001” / ±.001” | .00033” | ±.0002” | 0-25-0 | 1.4N or less |
| 1168T | .001” | .2” (.05”) | ±.001” / ±.001” / ±.001” | .00033” | ±.0002” | 50-0 | 1.4N or less |
* Completed products inspection is performed in the vertical position (contact point downward) and the stated accuracy is guaranteed.
FEATURES
Metric
Inch
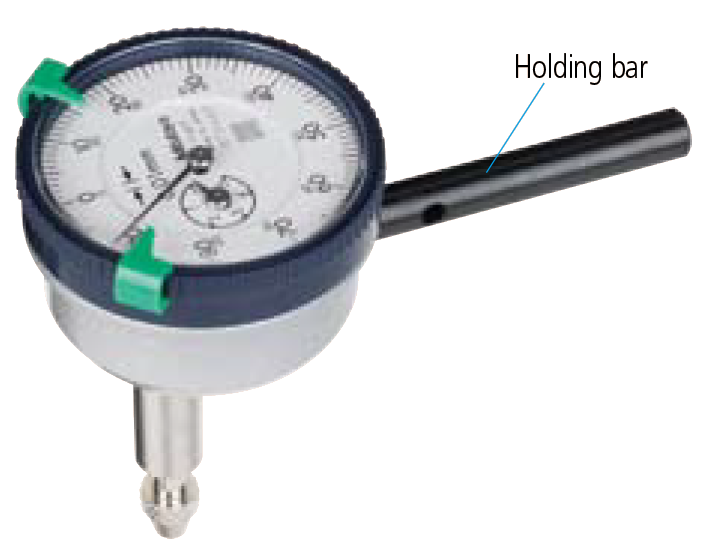
Holding bar (optional)
| Order No. | øD | L |
|---|---|---|
| 21AAA166 | ø6mm | 42mm |
| 136567 | ø6mm | 81mm |
| 124625 | ø6.35mm | 81mm |
| 21AAA167 | ø6.35mm | 42mm |
| 21AAA168 | ø8mm | 42mm |
| 136568 | ø8mm | 81mm |
* øD and L: detail shown in drawing below.


