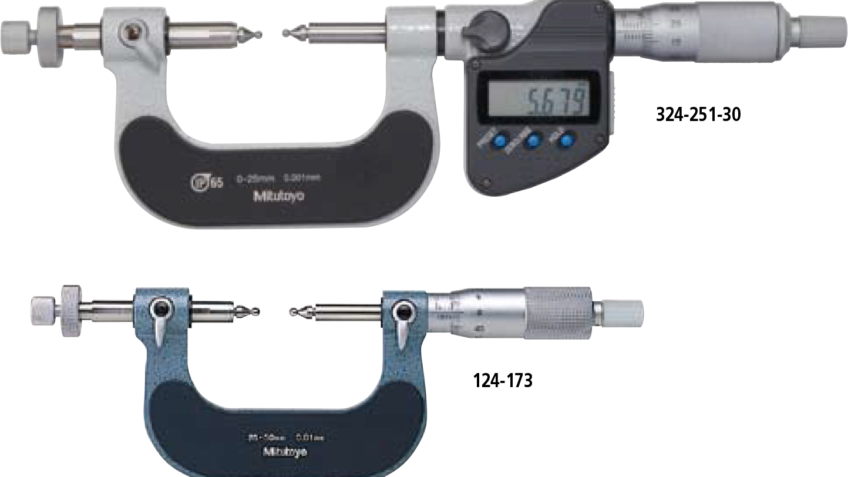
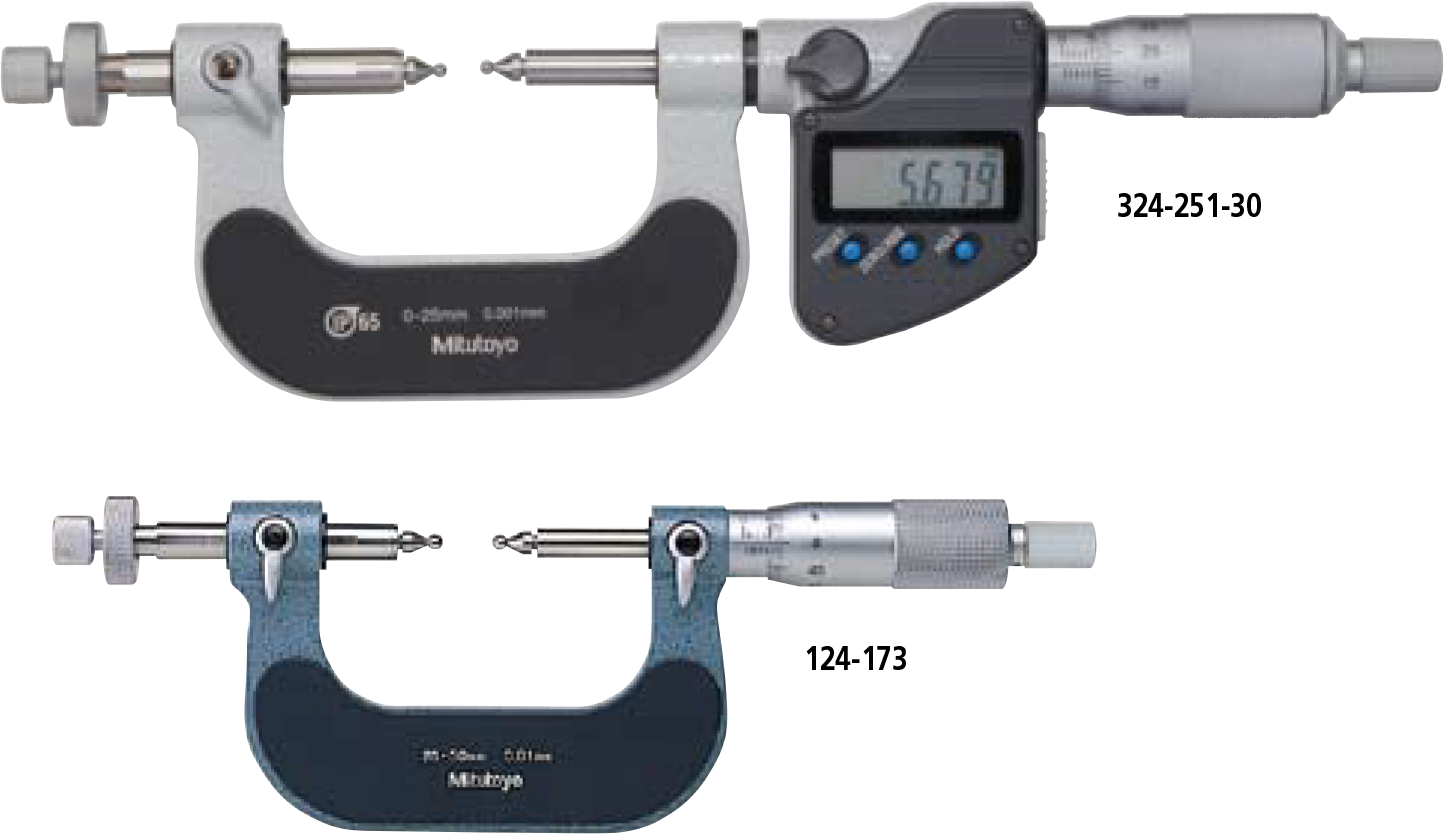
- Measures over-pin diameter of gears using precision steel (or carbide) ball anvils / spindle tips.
- Series 324: IP65 Digimatic gear tooth micrometers.
- Determination of the over-pin diameter: refer to “Quick Guide to Precision Measuring Instruments”.
- Interchangeable ball anvils / spindle tips for various gear modules (0.5-5.25) are optional.
- Equipped with Ratchet Stop for constant measuring force.
- Ball anvil / spindle tips: optional.
SPECIFICATIONS
Metric
| Order No. | Range | Resolution | Accuracy* |
|---|---|---|---|
| Digimatic (LCD) | |||
| 324-251-30 | 0 – 25mm |
0.001mm |
±4µm |
| 324-252-30 | 25 – 50mm | ||
| 324-253-30 | 50 – 75mm | ||
| 324-254-30 | 75 – 100mm | ±5µm | |
* Excluding quantizing error
Inch/Metric
| Order No. | Range | Resolution | Accuracy* |
|---|---|---|---|
| Digimatic (LCD) | |||
| 324-351-30 | 0 – 1″ |
.00005″/ 0.001mm |
±.0002″ |
| 324-352-30 | 1″ – 2″ | ||
| 324-353-30 | 2″ – 3″ | ||
| 324-354-30 | 3″ – 4″ | ±.00025″ | |
* Excluding quantizing error
Metric
| Order No. | Range | Graduation | Accuracy |
|---|---|---|---|
| Analog | |||
| 124-173 | 0 – 25mm |
0.01mm |
±4µm |
| 124-174 | 25 – 50mm | ||
| 124-175 | 50 – 75mm | ||
| 124-176 | 75 – 100mm |
±5µm |
|
| 124-177 | 100 – 125mm | ||
| 124-178 | 125 – 150mm | ||
| 124-179 | 150 – 175mm |
±6µm |
|
| 124-180 | 175 – 200mm | ||
| 124-181 | 200 – 225mm | ||
| 124-182 | 225 – 250mm |
±7µm |
|
| 124-183 | 250 – 275mm | ||
| 124-195 | 275 – 300mm | ||
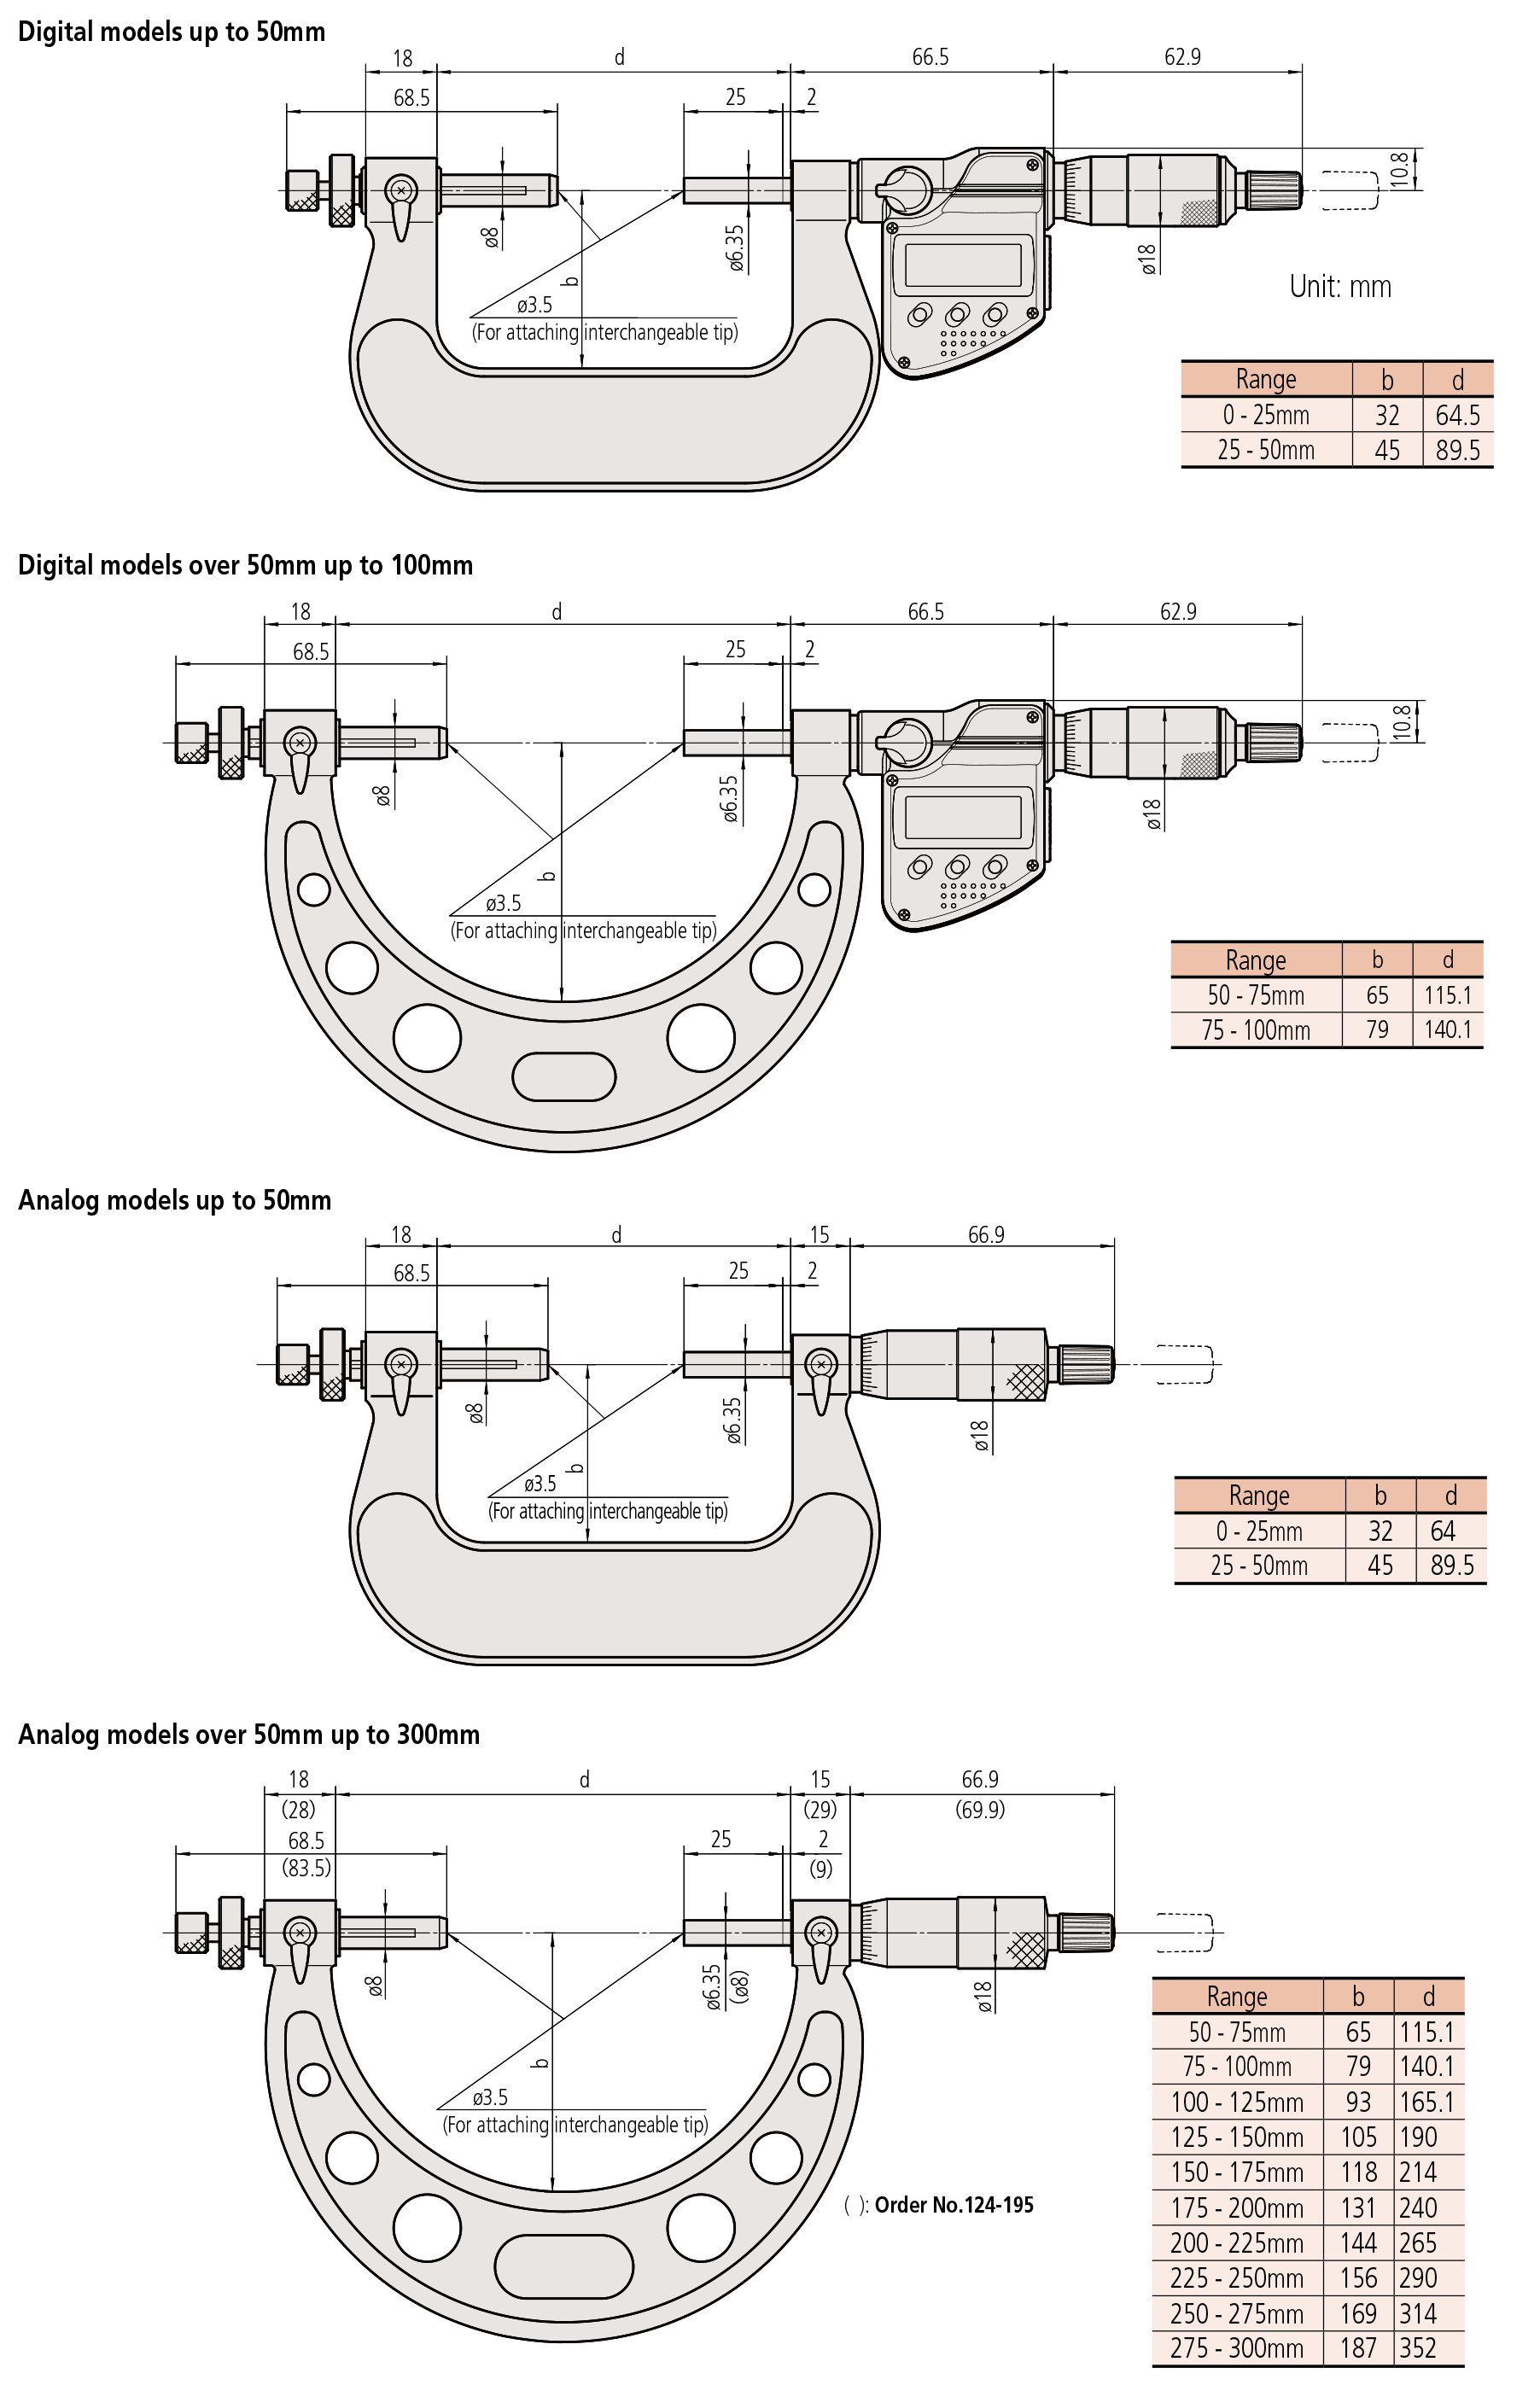
DIMENSIONS
IP Codes (series 324)
Level 6: Dust-proof.
No ingress of dust allowed.
Level 5: Protected against water jets.
Water projected in jets against the enclosure
from any direction shall have no harmful effects.
Optional accessories
Interchangeable ball anvil / spindle tip set
| Order No. | Diameter* (mm) | Gear module | Dia. pitch |
|---|---|---|---|
| 124-801 | 00.8 | 0.5 – 0.55 | 50 |
| 124-802 | 01.0 | 0.6 – 0.65 | 45 |
| 124-803 | 01.191 (3/64″) | 0.7 – 0.8 | 35 – 30 |
| 124-821 | 01.5 | 0.9 – 1 | 28 – 26 |
| 124-804 | 01.588 (1/16″) | 0.9 – 1 | 28 – 26 |
| 124-805 | 02.0 | 1.25 | 22 |
| 124-806 | 02.381 (3/32″) | 1.5 | 17 |
| 124-822 | 02.5 | 1.5 | 17 |
| 124-807 | 03.0 | 1.75 | 15 |
| 124-808 | 03.175 (1/8″) | — | 14 |
| 124-823 | 03.5 | 2 | 13 |
| 124-809 | 03.969 (5/32″) | 2 | 13 |
| 124-810 | 04.0 | 2.25 | 11 |
| 124-824 | 04.5 | 2.5 | 10 |
| 124-811 | 04.763 (3/16″) | 2.5 | 10 |
| 124-812 | 05.0 | 2.75 | 9 |
| 124-813 | 05.556 (7/32″) | 3.0 – 3.25 | 8 |
| 124-814 | 06.0 | 3.5 | 7 |
| 124-815 | 06.35 (1/4″) | 3.75 | 7 |
| 124-816 | 07.0 | 4.0 | 6.5 |
| 124-817 | 07.144 (9/32″) | 4.25 | 6 |
| 124-818 | 07.938 (5/16″) | 4.5 | 5.5 |
| 124-819 | 08.0 | 4.75 | 5.5 |
| 124-820 | 08.731 (11/32″) | 5.0 – 5.25 | 5 |
* ø2mm or less/ carbide-tipped type
Battery for series 324
SR44 (1 pc), 938882, for initial operational checks(standard accessory)
Battery life: Approx. 2.4 years under normal use (for series 324)
Length standard: Electromagnetic rotary sensor (for series 324)
Standard accessories: Reference bar, 1 pc (except for measuring range 0-25mm (0-1″) models) Spanner (301336), 1 pc
Optional accessories
Connecting cables for series 324
1m: 05CZA662
2m: 05CZA663
USB Input Tool Direct
USB-ITN-B (2m): 06ADV380B
SPC cables for U-WAVE w/ data switch (160mm):
02AZD790B
For foot switch: 02AZE140B
(Refer to page B-68 for details.)

