Call Us: +91-7410524141

BLOCK GAUGE & FLEXURES
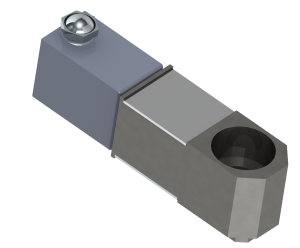
BG – Block Gauges Spring ± 1, ± 2.5, ± 5 mm measuring ranges Accuracy better than 1 um Up to 0.25 µm repeatability IP65 sealing Spring or Pneumatic Actuation Multiple tool holder and tip options Solartron’s Block Gauges makes precision measurements of bores and cavities a simple and reliable process. More generally, the use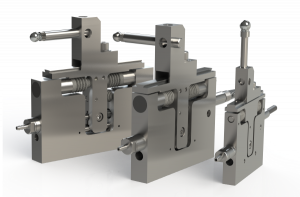 BG – Block Gauges Spring
- ± 1, ± 2.5, ± 5 mm measuring ranges
- Accuracy better than 1 um
- Up to 0.25 µm repeatability
- IP65 sealing
- Spring or Pneumatic Actuation
- Multiple tool holder and tip options
Solartron’s Block Gauges makes precision measurements of bores and cavities a simple and reliable process. More generally, the use of these devices is recommended in applications where space and access is limited and where the use of axial probes is not possible. The 2 mm Block Gauge is only 8 mm wide. The Block Gauges offer unrivalled ruggedness, accuracy and repeatability. All three units are extremely versatile and provide datum surfaces and all the adjustments required for precision gauging applications. Block Gauges have robust precision linear bearings with minimal clearance, which limits unmeasured movements maintaining good repeatability even when the contact tip is mounted off centre.
 BG – Block Gauges Pneumatic
- ± 1, ± 2.5, ± 5 mm measuring ranges
- Accuracy better than 1 um
- Up to 0.25 µm repeatability
- IP65 sealing
- Spring or Pneumatic Actuation
- Multiple tool holder and tip options
Solartron’s Block Gauges makes precision measurements of bores and cavities a simple and reliable process. More generally, the use of these devices is recommended in applications where space and access is limited and where the use of axial probes is not possible. The 2 mm Block Gauge is only 8 mm wide. The Block Gauges offer unrivalled ruggedness, accuracy and repeatability. All three units are extremely versatile and provide datum surfaces and all the adjustments required for precision gauging applications. Block Gauges have robust precision linear bearings with minimal clearance, which limits unmeasured movements maintaining good repeatability even when the contact tip is mounted off centre.
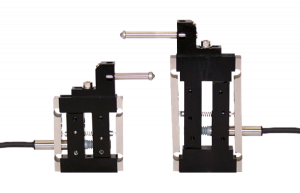
- ± 0.25, ± 0.5, ±1 mm measuring ranges
- Accuracy better than 1 um
- Up to 0.25 µm repeatability
- IP65 sealing
- Spring or Pneumatic Actuation
- Multiple tool holder and tip options
Parallel Flexures with high resolution and excellent repeatability make Solartron’s Flexure Transducers the first choice for high speed precision gauging. With no sliding moving parts, the flexure will maintain performance for millions of cycles and are virtually free from hysteresis. Flexures can be mounted such that there is little or no stress through the gauge line enabling precision profiling of moving materials such as rotating shafts, brake discs etc
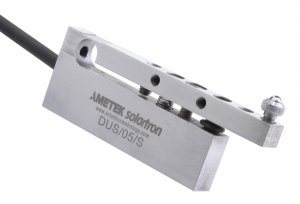
- ± 0.25 mm measuring range
- Extension arms
- Up to 0.25 µm repeatability
- IP65 sealing
- Normal or Reverse Spring Actuation
With the same advantages as the parallel flexure the single leaf flexure offers the gauge builder access to even more measurement points. With careful use of extension arms measurements can be made inside slots or between features where a conventional pencil probe cannot reach.
AM –Mini Probe
- ± 0.25, ± 0.5 mm measuring range
- Up to 0.01 µm resolution
- Up to 0.5 µm repeatability
- IP65 sealing
The Mini Probe is a compact, low profile transducer that is ideal for measurement in confined spaces, such as bores. The transducer is based on a parallel spring structure that ensures excellent repeatability over a long working life, even when rotated in bores that have key slots or lubrication ports. A Tungsten Carbide contact tip is fitted as standard but a selection of customer replaceable tips with an M2 thread is available for special applications. Repeatability depends on the alignment of the mini probe whether on axis or cross axis as shown in the diagram.

