Call Us: +91-7410524141
MITUTOYO-SERIES 547-ABSOLUTE DIGIMATIC DEPTH GAGE
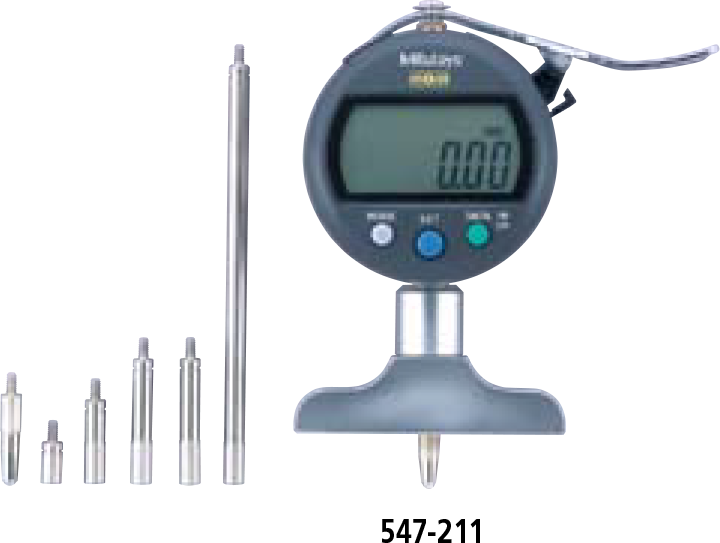
Easy-to-read dial effectively prevents misreading. Allows integration into statistical process control and measurement systems for models with measurement data output connector. Refer to page A-3. SPECIFICATIONS Metric Order No. Range Graduation Stroke Accuracy*4 Measuring force Base Contact point*1 Extension rod*2 Indicator*3 W T flatness 547-211 0 – 200mm 0.01mm 12.7mm ±20μm 1.5N- Easy-to-read dial effectively prevents misreading.
- Allows integration into statistical process control and measurement systems for models with measurement data output connector. Refer to page A-3.
SPECIFICATIONS
Metric
| Order No. | Range | Graduation | Stroke | Accuracy*4 | Measuring force | Base | Contact point*1 | Extension rod*2 | Indicator*3 | ||
|---|---|---|---|---|---|---|---|---|---|---|---|
| W | T | flatness | |||||||||
| 547-211 |
0 – 200mm |
0.01mm |
12.7mm |
±20μm |
1.5N |
63.5mm |
16mm |
5μm | Provided with a carbide-tipped ball point (No.21JAA224) |
5 pcs. (10, 20, 30, 30, 100mm) |
543-400B*3 |
| 547-212 | 101.6mm | ||||||||||
| 547-251 | 0.001mm | ±5μm | 63.5mm | 2μm | 543-390B | ||||||
| 547-252 | 101.6mm | ||||||||||
Inch/Metric
| Order No. | Range | Graduation | Stroke | Accuracy*4 | Measuring force | Base | Coutact point*1 | Extension rod*2 | Indicator*3 | ||
|---|---|---|---|---|---|---|---|---|---|---|---|
| W | T | flatness | |||||||||
| 547-217S |
0 – 8” |
.0005″/0.01mm |
.5” |
±.001” |
1.5N |
2.5” |
.63” |
.0002” | Provided with a carbide-tipped ball point (No.21JZA242) |
4 pcs. (.5″, 1″, 2″, 4″) |
543-402B*3 |
| 547-218S | 4” | ||||||||||
| 547-257S | .00005″/0.001mm | ±.0002” | 2.5” | .00008” | 543-392B | ||||||
| 547-258S | 4” | ||||||||||
*1 to *3: Refer to page D-68.
*4: Excluding quantizing error.
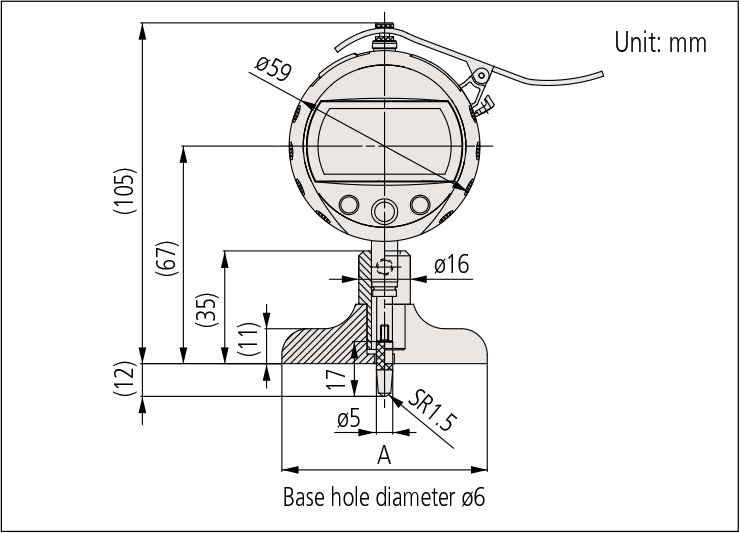
DIMENSIONS


