Call Us: +91-7410524141
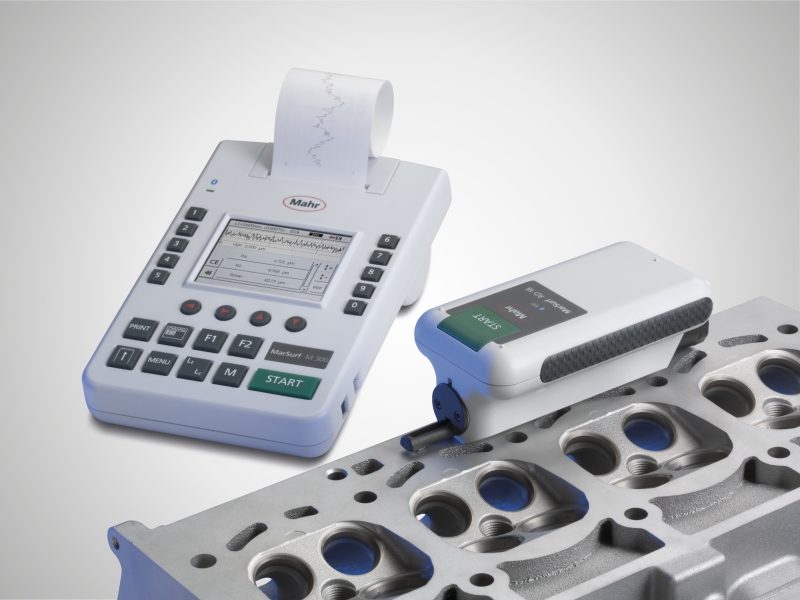
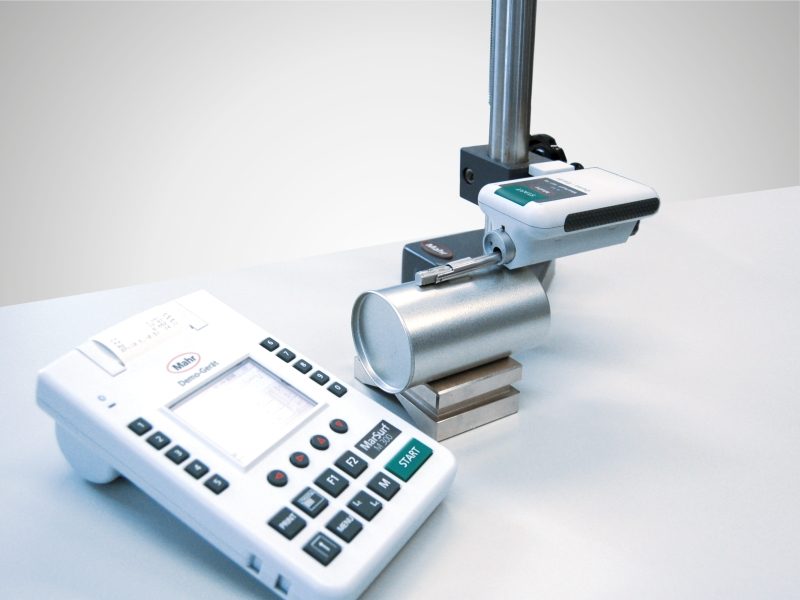
MARSURF M 300 MOBILE ROUGHNESS MEASURING INSTRUMENT
First portable roughness measuring unit with the option of wireless (Bluetooth) connection between the evaluation unit and drive unit Easy to use, with high-resolution color display and menu-driven user guidance Integrated standard in the drive unit Large measuring range – 350 µm Automatic profile detection and corresponding selection of filter and traversing length conforming toTechnical data
|
6910401 – M300 MARSURF SET – 2 UM INCLUDES 2 MICRON STYLUS
|
6910411 – M300 MARSURF SET – 5 UM INCLUDES 5 MICRON STYLUS
|
|
|
Measuring principle
|
Stylus method
|
Stylus method
|
|
Probe
|
Inductive skidded probe
|
Inductive skidded probe
|
|
Measuring units
|
selectable
|
selectable
|
|
Measuring range mm
|
0,350
|
0,350
|
|
Profile resolution
|
8 nm
|
8 nm
|
|
Vertical Scale
|
automatic/selectable
|
automatic/selectable
|
|
Horizontal scale
|
Depends on cutoff
|
Depends on cutoff
|
|
Log contents
|
R profile, MRK,
P profile (MOTIF), results |
R profile, MRK,
P profile (MOTIF), results |
|
Filter according to ISO/JIS
|
Gauß-Filter, Ls-Filter
|
Gauß-Filter, Ls-Filter
|
|
Short stroke under ISO/JIS
|
Selectable
|
Selectable
|
|
Evaluation lenth In according to ISO/JIS
|
1.25 mm, 4 mm, 12.5 mm
|
1,25 mm, 4 mm, 12,5 mm
|
|
Number n of sampling length according to ISO/JIS
|
Selectable: 1-5
|
Selectable: 1-5
|
|
Contacting speeds
|
0.5 mm/s
|
0.5 mm/s
|
|
Stylus
|
2 µm
|
5 µm
|
|
Measuring force (N)
|
0,00075
|
0,00075
|
|
LC display
|
High resolution color display, 3.5″, 320 x 240 pixel
|
High resolution color display, 3.5″, 320 x 240 pixel
|
|
Printing
|
Automatic/manual
record with time |
Automatic/manual
record with time |
|
Printer
|
Thermal printer, 384 points/horizontal line, 20 characters/line
|
Thermal printer, 384 points/horizontal line, 20 characters/line
|
|
Printing speed
|
Approx. 6 lines/second corresponds to approx. 25 mm/s (1 in/s)
|
Approx. 6 lines/second corresponds to approx. 25 mm/s (1 in/s)
|
|
Thermopaper
|
Ø 40.0 mm-1.0 mm, width 57.5 mm-0.5 mm, coated
|
Ø 40.0 mm-1.0 mm, width 57.5 mm-0.5 mm, coated
|
|
Calibration function
|
dynamic
|
Dynamic
|
|
Password protection
|
Yes
|
Yes
|
|
Lock for device settings
|
Yes
|
Yes
|
|
Power management
|
Yes
|
Yes
|
|
Interfaces
|
Drive unit, power pack, USB, MarConnect
|
Drive unit, power pack, USB, MarConnect
|
|
Relative humidity
|
30 % to 85 %
|
30 % to 85 %
|
|
System of protection
|
M 300 = IP 42, RD 18 = IP 40
|
M 300 = IP 42, RD 18 = IP 40
|
|
Operating temp. range
|
+5 °C to +40 °C
|
+5 °C to +40 °C
|
|
Temperature range for storage
|
-15 °C to +55 °C
|
-15 °C to +55 °C
|
|
Power supplied
|
NiMH battery, capacity: approx. 1,000 measurements (depends on number and
length of record printouts), plug-in power pack with three power adapters, for input voltages from 90 V to 264 V |
NiMH battery, capacity: approx. 1,000 measurements (depends on number and
length of record printouts), plug-in power pack with three power adapters, for input voltages from 90 V to 264 V |
|
Dimensions (L x W x H) for drive unit in mm.
|
130 x 70 x 50 mm
|
130 x 70 x 50 mm
|
|
Weight drive unit
|
Approx. 300 g
|
Approx. 300 g
|
|
Dimensions (L x W x H) for measuring instrument in mm.
|
190 x 140 x 75 mm
|
190 x 140 x 75 mm
|
|
Weight measuring instrument
|
Approx. 1 kg
|
Approx. 1 kg
|
- First portable roughness measuring unit with the option of wireless (Bluetooth) connection between the evaluation unit and drive unit
- Easy to use, with high-resolution color display and menu-driven user guidance
- Integrated standard in the drive unit
- Large measuring range – 350 µm
- Automatic profile detection and corresponding selection of filter and traversing length conforming to standards
- Integrated memory for results of up to 40,000 measurements and 30 profiles
- 16 languages (including 3 Asian languages)
- Integrated thermal graphics printer with high print quality
- Log printed by pressing a button or automatically
- Data transfer of results and profiles via USB interface to your PC
- Evaluation of most common parameters as well as characteristic curves, parameter lists (e.g. material ratio curve)
- Integrated memory for results and profiles
- Tolerance monitoring
- Printing of R profile (ISO/ASME/JIS), P profile (MOTIF), material ratio curve, measuring record
- The setting of asymmetric intersection lines for peak count calculation
- Measuring units (μm/μin) and standards (ISO/JIS/ASME/MOTIF) are selectable
- Individual sampling lengths and short cutoff can be selected
- Lock for instrument settings
- Built-in rechargeable battery with power management
- AC adapter with interchangeable international plug adapters
- Date and time of measurement
- Suitable for use with the stationary measuring station
- For use with PHT probe range
- MarSurf PS1/M300 Explorer Software for recording measurements
 |
 |
|


