Call Us: +91-7410524141
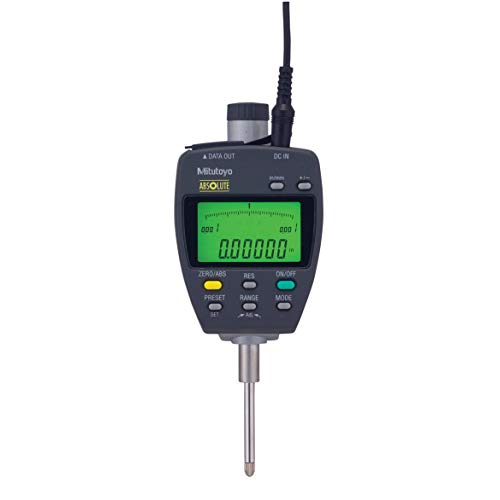
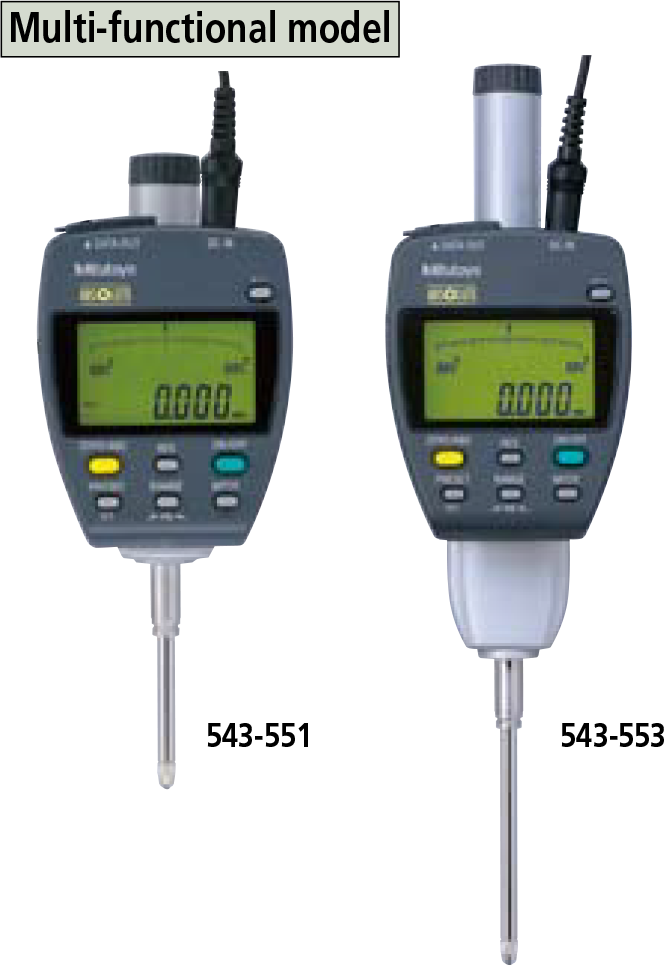
MITUTOYO-SERIES 543 – WITH BACK-LIGHT LCD SCREEN-ABSOLUTE DIGIMATIC INDICATOR ID-F
GO/±NG judgment function: If a judgment result shows an out of tolerance condition, the display backlighting changes from green to red. An analog bar indicator has been integrated to make upper/lower limit and turnover point reading more comfortable. With Mitutoyo’s ABSOLUTE Linear Encoder technology, once the measurement reference point has been set it will notSPECIFICATIONS
Metric
| Order No.* | Range | Resolution | Accuracy** |
|---|---|---|---|
| 543-551 | 25mm |
0.001mm, 0.01mm |
0.003mm |
| 543-557 | 50mm | 0.003mm | |
| 543-553 | 50mm | 0.006mm |
* To denote your AC power cable add the following suffixes to the order No.: A for UL/CSA, D for CEE, DC for CCC, E for BS, K for KC, No suffix is required for JIS/100V
**Quantizing error of ±1 count is excluded.
Inch/Metric
| Order No.* | Range | Resolution | Accuracy** |
|---|---|---|---|
| 543-552 | 1” /
25.4mm |
.00005”, .0001”, .0005”, .001”, 0.001mm, 0.01mm |
.00012” /
0.003mm |
| 543-558 | 2” /
50.8mm |
.00012” /
0.003mm |
|
| 543-554 | 2” /
50.8mm |
.00024” /
0.006mm |
* To denote your AC power cable add the following suffixes to the order No.: A for UL/CSA, D for CEE, DC for CCC, E for BS, K for KC, No suffix is required for JIS/100V
**Quantizing error of ±1 count is excluded.
DIMENSIONS
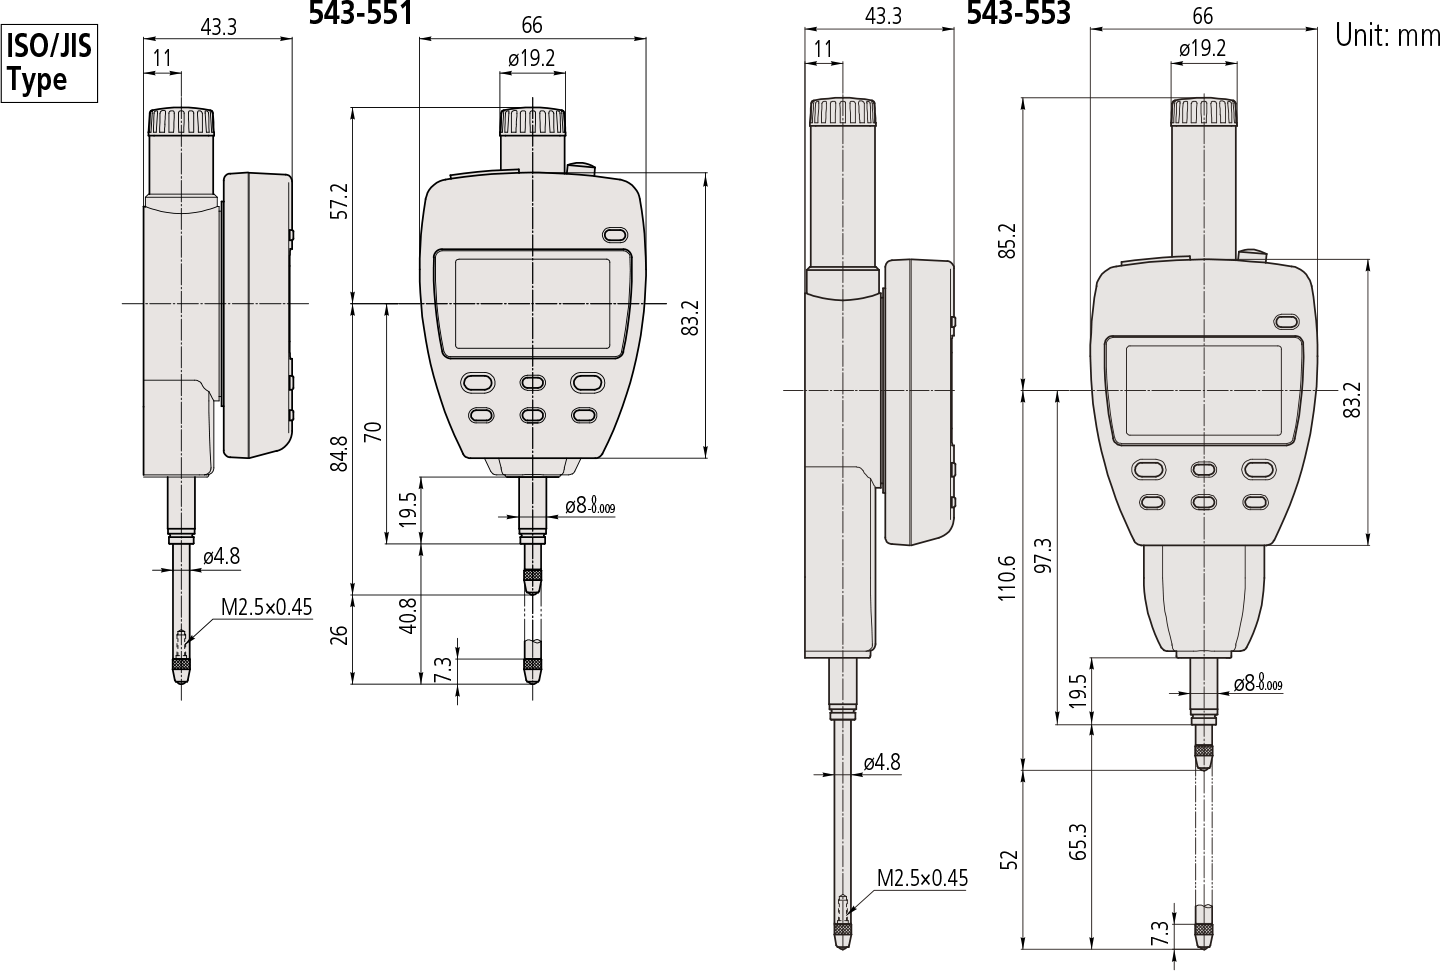
Note 1: Dimensions of the inch (ANSI/AGD Type) dial indicator partly differ from those of the metric (ISO/JIS Type) indicator.
Note 2: Inch (ANSI/AGD Type) dial indicators are provided with a stem of 3/8″ dia. and #4-48UNF thread mount for the contact point.
Technical Data
Resolution: 0.01mm/0.001mm or .00005”/.0001”/.0005
”/.001”/0.001mm/0.01mm
Display: 6-digit LCD, sign, and analog bar with 2-color
backlight
Scale type: ABSOLUTE electrostatic linear encoder
Max. response speed: Unlimited
Measuring force: 1.8N or less (25.4mm models)
2.3N or less (50.8mm models)
Spindle orientation: Between the spindle pointing vertically
downward to the spindle horizontal
Stem dia.: 8mm (ISO/JIS type) or 3/8” (ANSI/AGD type)
Power supply: 9V DC (via AC adaptor) 06AEG302
Lifting lever: 137693
* To denote your AC power cable add the following
suffixes to the order No.: A for UL/CSA, D for CEE, DC
for CCC, E for BS, K for KC, No suffix is required for
JIS/100V
Functions
Preset, Zeroset, GO/±NG judgment, Max/Min value hold,
Runout measurement, Resolution switching,
Counting direction switching, Power ON/OFF, Data output,
inch/mm conversion (inch/mm models)
Alarm: Counting value composition error, Overflow
error, Tolerance limit setting error
Optional Accessories
• Lifting cable: No.540774 (stroke 25.4mm)
• Auxiliary spindle spring:
No.02ACA571 (25.4mm/1” models)*
No.02ACA773 (50.8mm/2” models)*
• Lug-on-center back:
No.101040 (ISO/JIS type)
No.101306 (ASME/ANSI/AGD type)
* Required when orienting the indicator upside down.
• SPC cable:
No.936937 (1m)
No.965014 (2m)
• USB Input Tool Direct (2m) : No.06ADV380F
• Connecting Cables for U-WAVE-T (160mm) :
No.02AZD790D
For footswitch: No.02AZE140D
Refer to page F-60 for details.
• Digimatic Mini-Processor DP-1VR: 264-504
• Contact points for Mitutoyo’s dial indicators *
• Interchangeable backs for Series 2 models*
• Measuring stands
* 4 Refer to pages F-46 to F-49 for details.
* 5 Refer to page F-50 for details.
Application
Difference/Runout measurement
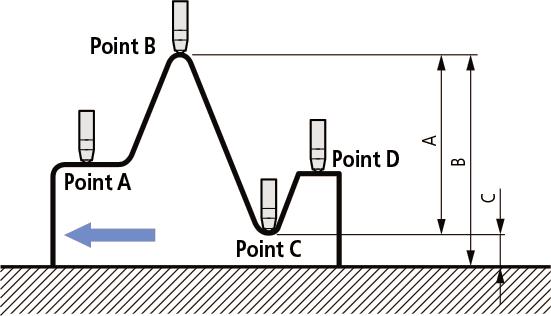
Example: Indicator travel from points A to D
Difference (or Total Runout) is displayed as A. Dimensions B (maximum value) and C (minimum value) can be recalled from memory with a simple key sequence.
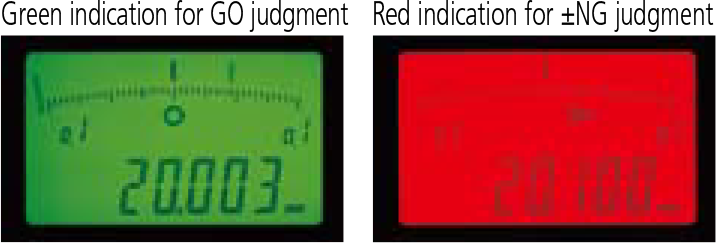
- GO/±NG judgment function: If a judgment result shows an out of tolerance condition, the display backlighting changes from green to red.
- An analog bar indicator has been integrated to make upper/lower limit and turnover point reading more comfortable.
- With Mitutoyo’s ABSOLUTE Linear Encoder technology, once the measurement reference point has been set it will not be lost when the power is turned off. Also, reliability has been increased due to the elimination of over-speed errors.
Note: Regarding origin setting, refer to “Origin Setting of Digimatic Indicators” on page F-18. - Easy-to-read large LCD readout with the character height of 8.5mm.
- External power supply type: battery change is not necessary. Power can also be supplied via the AC adapter supplied as a standard accessory.
- The resolution can be switched between 0.001mm /0.01mm (or .001” /.0005”/.0001” /.00005”).
- Equipped with a data output port that enables incorporation into measurement networking and statistical process control systems.
